Translate to your language

CARI ARTIKELMU DI SINI

Showing posts with label widget. Show all posts

cara membuat teks berjalan naik otomatis

cara paling mudah membuat teks berjalan naik otomatis


langsung saja ya.... ini contohnya:


https://www.niagahoster.co.id/ref/80291?r=domain-murah


silakan kamu copy dulu script di bawah ini:


<marquee  bgcolor="purple" onmouseover="this.stop()" onmouseout="this.start()" scrollamount="2" direction="up" width="700" height="200" align="center" behavior=”alternate”><div class="separator" style="clear: both; text-align: center;">
teks di sini</marquee>


cara memasangnya:

1 masuk ke blogger
2 klik " tata letak "
3 klik " tambah gadget "
4 klik " html/java script"
5 masukkan kode script yang sudah di copy, warna merah ganti dengan tulisan yang kamu inginkan
6 klik " simpan "
7 coba lihat blog dengan klik " lihat blog "
8 dan.............................
9 teks berjalan naiknya sudah terpasang

selamat mencoba


ada 2 Cara Menampilkan Widget/Iklan/Link/Script HANYA di Bagian Posting (Post Body)

ada 2 Cara Menampilkan Widget/Iklan/Link/Script HANYA di Bagian Posting (Post Body)


Let's go straight to the point! Jika anda ingin menampilkan widget, iklan,
link, ataupun script anda hanya di bagian bawah posting saja (menyembunyikan widget dari homepage) dan tidak ingin menampilkannya di bagian lain, termasuk halaman muka, you can follow these two tricks.

Ada dua cara yang bisa digunakan:
1. Jika blog anda berplatform blogger, anda dapat memanfaatkan fitur dalam setting. Login ke dashboard anda, dan:
:

Klik Setting


 Klik Formatting/format


Scroll ke bawah hingga post template. Anda dapat memasukkan script, link aktif , atau sekedar tulisan saja ke dalam form di sebelahnya. Save settings. That's it.


2. Anda dapat mengedit template html blog dan memasukkan tag b if cond, yang berfungsi sebagai perintah untuk menampilkan suatu hanya pada bagian tertentu. Cara ini saya dapat sebagai salah satu trik untuk menyembunyikan Google Adsense di blog yang lain dan ternyata bisa juga digunakan untuk script lain, misalnya widget-widget tambahan,
baik dalam HTML murni maupun java. Masuk ke edit HTML, centang expand widget templates, dan masukkan kode berikut Tepat SEBELUM </body> (gunakan Ctrl+F untuk mencari):


<b:if cond='data:blog.pageType == &quot;item&quot;'>
script widget/iklan/script lain anda disini
</b:if>

Ganti  script widget/iklan/script lain anda disini dengan script atau link aktif anda dan save.

Analisis, kelebihan, dan kekurangan:
Cara 1: Cara ini mudah dan cenderung tidak beresiko. Cara ini sama saja dengan menyisipkan script ke dalam edit HTML anda di dalam posting (sebelah compose), sehingga script anda merupakan bagian posting. Dengan demikian, widget ataupun iklan anda akan muncul setelah anda membuat posting baru.

Anda harus mengedit posting lama untuk menyisipkan script. Selain itu karena bersifat eksternal, load time yang dibutuhkan relatif lebih banyak. Cara ini pada akhirnya bersifat jauh lebih  manual dari cara 2.
Cara 2: Memasukkan script secara manual ke dalam template HTML blog memang hal yang sering dihindari, apalagi setelah Blogger memiliki banyak fitur instan. Namun yakinlah hasilnya akan berbeda dan lebih baik. Cara ini berarti mengintegralkan script dengan template blog, sehingga secara otomatis akan muncul dalam semua bagian blog yang diberi perintah untuk dimunculkan.
Dengan demikian, semua posting lama anda pun akan 'terinfiltrasi' secara otomatis. Load time yang dibutuhkan relatif lebih cepat (catatan: tergantung dari jenis file widget dan server dari widget tersebut).


3D online visitor


mau punya tampilan 3D online visitor pada blog kamu?
di sini ada 3D online visitor dengan bentuk globe, dan mudahnya lagi kita tidak perlu daftar ,hehehe


bagaimana cara memasangnya?, ikuti langkah berikut:

copy dulu kode script di bawah ini:


<script type="text/javascript" src="//ra.revolvermaps.com/0/0/6.js?i=06o09hffn02&amp;m=7&amp;s=320&amp;c=e63100&amp;cr1=ffffff&amp;f=arial&amp;l=0&amp;bv=90&amp;lx=-420&amp;ly=420&amp;hi=20&amp;he=7&amp;hc=a8ddff&amp;rs=80" async="async"></script>

cara memasang:


1 masuk ke blogger.com
2 klik "tambah gadget"
3 klik " html/java script"
4 masukkan / paste kode script di atas
5 klik " simpan "
6 klik " lihat blog "
7 dan 3D online visitor kamu sudah terpasang
8 atau kamu mau model yang lainnya ,,,, ? silakan kunjungi di revolvermaps
9 dan selesai sudah.,semoga bermanfaat


cara paling mudah membuat tulisan melayang mengikuti cusor mouse pada blog


https://pakrus.blogspot.com
kali ini saya akan berbagi ilmu tentang cara paling mudah membuat tulisan melayang megikuti cusor mouse.


sudahkah anda melihat tampilan blog dengan tulisan melayang mengikuti cusor mouse. di geser ke kiri ikut ke kiri , di geser ke kanan ikut ke kanan, dan juga bisa mempercantik blog kamu....hehehehe

bagaimana caranya ?? silakan ikuti langkah berikut:

silakan copy dulu kode script di bawah ini

<style type='text/css'>
#outerCircleText {
font-style: italic;
font-weight: bold;
font-family: 'comic sans ms', verdana, arial;
color: #0000ff; /* warna huruf */
position: absolute;top: 0;left: 0;z-index: 3000;cursor: default;}
#outerCircleText div {position: relative;}
#outerCircleText div div {position: absolute;top: 0;left: 0;text-align: center;}
</style>

<script type='text/javascript'>
//<![CDATA[
;(function(){
// Your message here (QUOTED STRING)
var msg = "CAESAR ALAM BLOG"; /*CAESAR ALAM BLOG */
/* THE REST OF THE EDITABLE VALUES BELOW ARE ALL UNQUOTED NUMBERS */
// Set font's style size for calculating dimensions
// Set to number of desired pixels font size (decimal and negative numbers not allowed)
var size =40; /* ukuran huruf */
// Set both to 1 for plain circle, set one of them to 2 for oval
// Other numbers & decimals can have interesting effects, keep these low (0 to 3)
var circleY = 0.75; var circleX = 2;
// The larger this divisor, the smaller the spaces between letters
// (decimals allowed, not negative numbers)
var letter_spacing = 5;
// The larger this multiplier, the bigger the circle/oval
// (decimals allowed, not negative numbers, some rounding is applied)
var diameter = 10;
// Rotation speed, set it negative if you want it to spin clockwise (decimals allowed)
var rotation = 0.4;
// This is not the rotation speed, its the reaction speed, keep low!
// Set this to 1 or a decimal less than one (decimals allowed, not negative numbers)
var speed = 0.3;
////////////////////// Stop Editing //////////////////////
if (!window.addEventListener && !window.attachEvent || !document.createElement) return;
msg = msg.split('');
var n = msg.length - 1, a = Math.round(size * diameter * 0.208333), currStep = 20,
ymouse = a * circleY + 20, xmouse = a * circleX + 20, y = [], x = [], Y = [], X = [],
o = document.createElement('div'), oi = document.createElement('div'),
b = document.compatMode && document.compatMode != "BackCompat"? document.documentElement
:
document.body,
mouse = function(e){
e = e || window.event;
ymouse = !isNaN(e.pageY)? e.pageY : e.clientY; // y-position
xmouse = !isNaN(e.pageX)? e.pageX : e.clientX; // x-position
},
makecircle = function(){ // rotation/positioning
if(init.nopy){
o.style.top = (b || document.body).scrollTop + 'px';
o.style.left = (b || document.body).scrollLeft + 'px';
};
currStep -= rotation;
for (var d, i = n; i > -1; --i){ // makes the circle
d = document.getElementById('iemsg' + i).style;
d.top = Math.round(y[i] + a * Math.sin((currStep + i) / letter_spacing) * circleY - 15) +
'px';
d.left = Math.round(x[i] + a * Math.cos((currStep + i) / letter_spacing) * circleX) + 'px';
};
},
drag = function(){ // makes the resistance
y[0] = Y[0] += (ymouse - Y[0]) * speed;
x[0] = X[0] += (xmouse - 20 - X[0]) * speed;
for (var i = n; i > 0; --i){
y[i] = Y[i] += (y[i-1] - Y[i]) * speed;
x[i] = X[i] += (x[i-1] - X[i]) * speed;
};
makecircle();
},
init = function(){ // appends message divs, & sets initial values for positioning arrays
if(!isNaN(window.pageYOffset)){
ymouse += window.pageYOffset;
xmouse += window.pageXOffset;
} else init.nopy = true;
for (var d, i = n; i > -1; --i){
d = document.createElement('div'); d.id = 'iemsg' + i;
d.style.height = d.style.width = a + 'px';
d.appendChild(document.createTextNode(msg[i]));
oi.appendChild(d); y[i] = x[i] = Y[i] = X[i] = 0;
};
o.appendChild(oi); document.body.appendChild(o);
setInterval(drag, 25);
},
ascroll = function(){
ymouse += window.pageYOffset;
xmouse += window.pageXOffset;
window.removeEventListener('scroll', ascroll, false);
};
o.id = 'outerCircleText'; o.style.fontSize = size + 'px';
if (window.addEventListener){
window.addEventListener('load', init, false);
document.addEventListener('mouseover', mouse, false);
document.addEventListener('mousemove', mouse, false);
if (/Apple/.test(navigator.vendor))
window.addEventListener('scroll', ascroll, false);
}
else if (window.attachEvent){
window.attachEvent('onload', init);
document.attachEvent('onmousemove', mouse);
};
})();
//]]>
</script>


cara memasangnya:

1 masuk ke blogger.com
2 klik " tata letak "
3 klik " tambah gadget "
4 klik " html/java script "
5 paste kode script yang sudah anda copy tadi,  tulisan berwarna  merah ganti dengan tulisan yang anda inginkan
6 klik " simpan "
7 lihat blog kamu

dan tulisan melayang megikuti cusor mouse sudah terpasang.. heheheheh mudah kan

selamat mencoba.

Baca Juga:


how to make ads pop up widget hovering blog

http://propellerads.com/?rfd=X1n"


how to make ads pop up widget hovering blog

have you see blogs that have pop-up ads that float in the middle of the blog? wow it could be a cool blog.

to create the widget is easy and fast. follow these steps on how to create a widget ads pop up floating in the middle of the blog:

copy the script below:


<style>
#topbar {
height:30px;
width:auto;
background: #005094 url('http://lh3.ggpht.com/_beEpWOXwLJE/TIb57Lu4fwI/AAAAAAAABE0/q7niFVRbyNE/top-toolbar.jpg');
background-repeat:repeat-x;
text-align:left;
padding-top:4px;
}
#adsground {
height:auto;
margin:0 auto;
width: 728px;
background:#fff;
border-bottom:2px #005094 solid;
border-right:2px #005094 solid;
border-left:2px #005094 solid;
text-align:Center;
padding:4px;
}


#headlineatas {
opacity:1.0;
height:auto;
width:auto;
position:fixed;
top:65px;
left:170px;
border-bottom:1px #005094 solid;
border-bottom:0px blue solid;
color:#333;
padding:0px;
z-index:1001;
font-size:13px;}
</style>
<script type="text/javascript">
function getValue()
{
document.getElementById("headlineatas").style.display = 'none';
}
</script>
<div id="headlineatas">
<div id="topbar">

<span style="color:#fff;font-size:13px;font-weight:bold;text-shadow:black 0.1em 0.1em 0.1em"></span>
<span style="color:#fff;font-size:13px;font-weight:bold;text-shadow:black 0.1em 0.1em 0.1em;float:right;padding-top:3px;padding-right:10px"><a href="http://www.propellerads.com/?rfd=X1n" target="_blank" onclick="getvalue()">close</a></span>
</div>
<div id="adsground">

<p align="left"><h3>100% traffic monetization
We maximize your income by efficiently monetizing global web and mobile traffic across all devices and platforms with highest eCPM rates.International publisher network
More than just being the best we are also one of the biggest ad networks, with over 650M daily advertising impressions across the globe
.
</h3></p>
<p>
<a href="http://propellerads.com/?rfd=X1n"><img src="http://promo.propellerads.com/300x250-popads_1.gif" alt="Propellerads" /></a><br /><a href="http://propellerads.com/?rfd=X1n"><img src="http://promo.propellerads.com/468x60_02.jpg" alt="Propellerads" /></a>
               
                </p></div>
<br />
<br/></div>

how to install it:


1. go toblogger.com
2. select "layout"
3. select "add gadgets"
4. select "html / java script "
5. paste the script was in the copy, change the text in yellow with the blog address you want, change the color black with the word you want to write, change the color red with script code ad / banner
6. click save

and you're done , look at your blog and is mounted pop up ads on your blog

is easy is not it?


widget random post dan label warna warni dan cara membuatnya

cara membuat widget random pos warna warni


random pos

untuk mempercantik blog kamu, kamu bisa membuat widget random pos warna warni. Selain untuk mempercantik blog juga sebagai artikel populer , sehingga pengunjung bisa langsung melihat apa saja isi dari blog kamu.

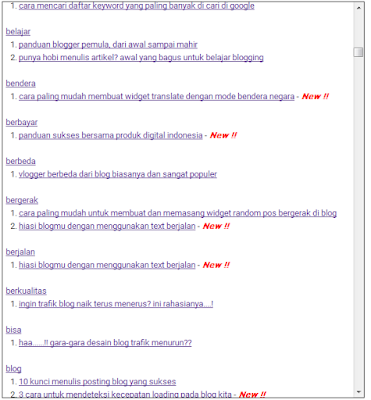
cara membuat daftar isi yang paling mudah

cara membuat daftar isi yang paling mudah


daftar isi

masih bingung cara membuat daftar isi yang m,udah dan cepat, tidak perlu menulis link satu per satu.
lebih baik membuat postingan daripada membuat link untuk daftar isi,hehehe